Build Version: 2026-09-09-06:27:55 UTC
Purpose:
To provide a user experience to view the site application fields in the sites preferred language, as well as offering additional options to individual users based on their needs.
NOTE: This does not include dropdowns or model content translation during this release. This is focused on the column headings and the various locations where only English is shown.
Feature:
To provide site the available options to translate the site application to their available languages for users to access.
Within Site Settings there is a new Language Setting section that has current available languages loaded for use. If others are required, please send a request via the EMI3 Support Ticket System
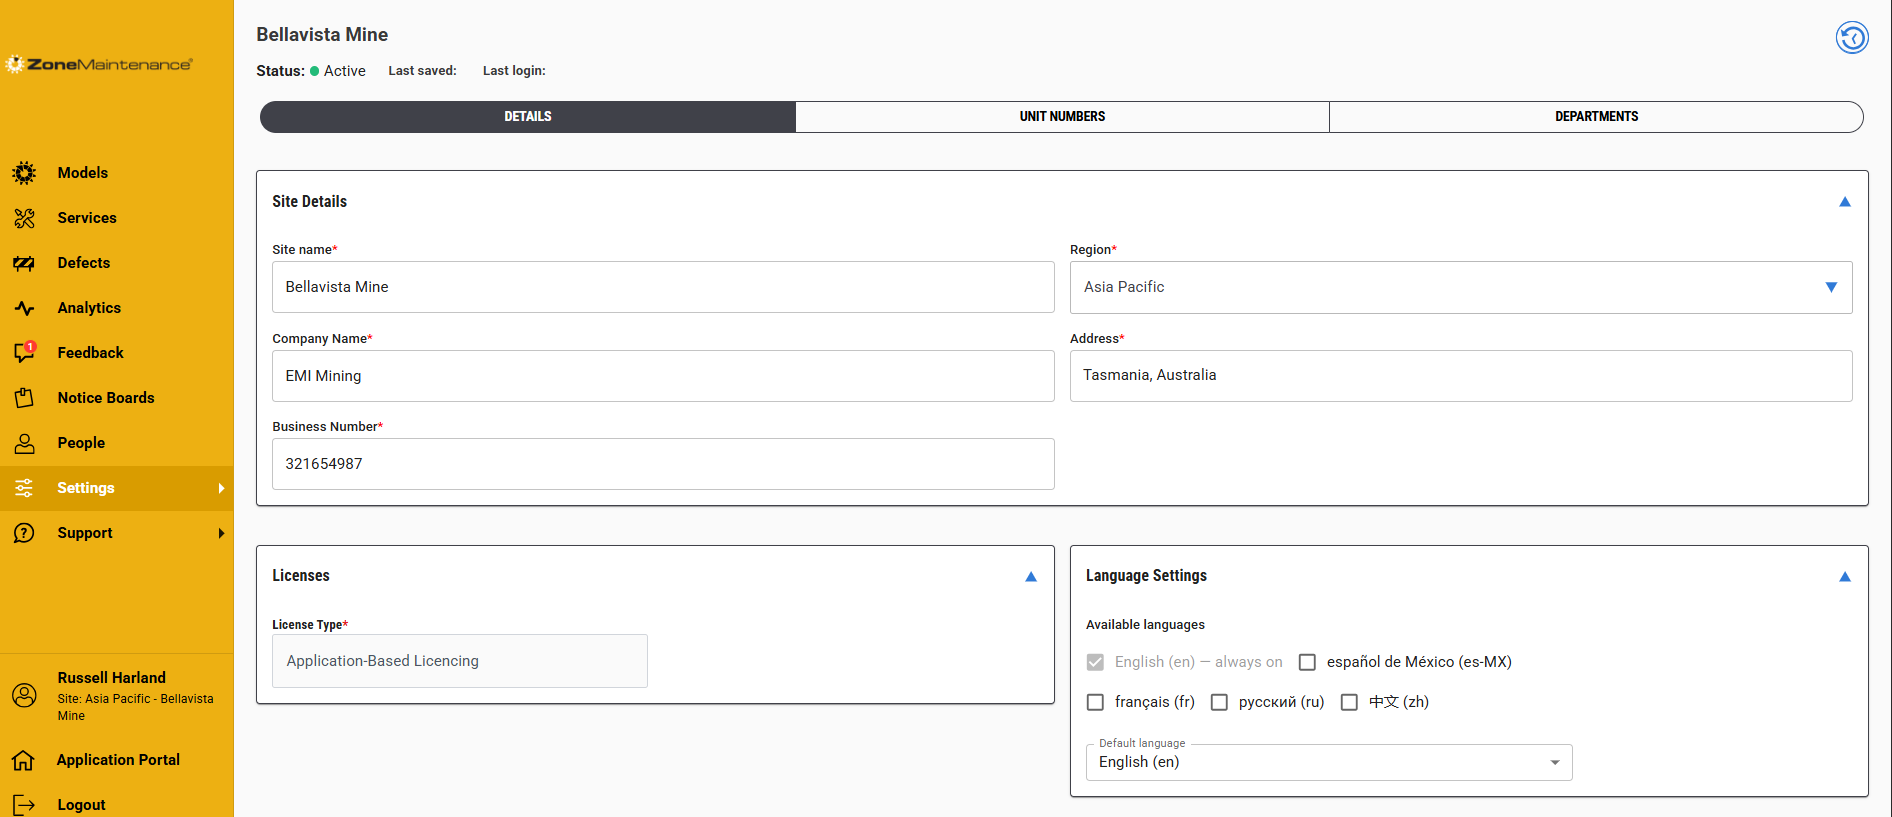
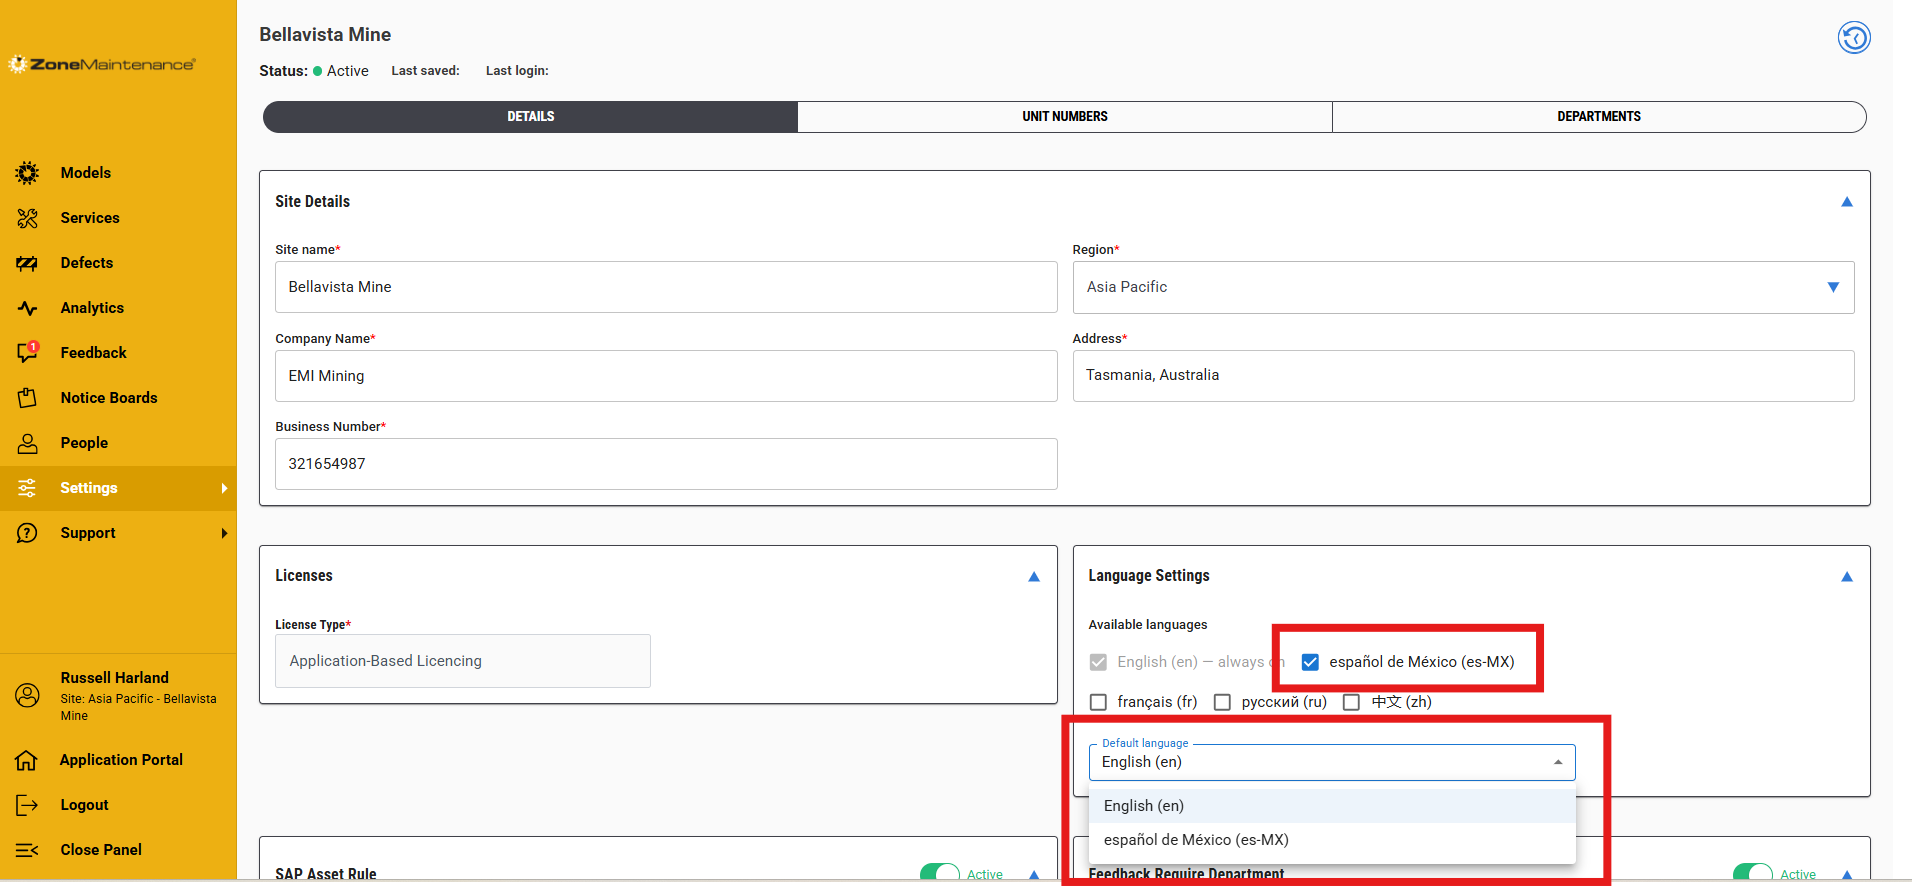
Site Administrator can select the available languages and the default language. The default language will update the application to this selection and the user can select their preferred language in their user profile setting.
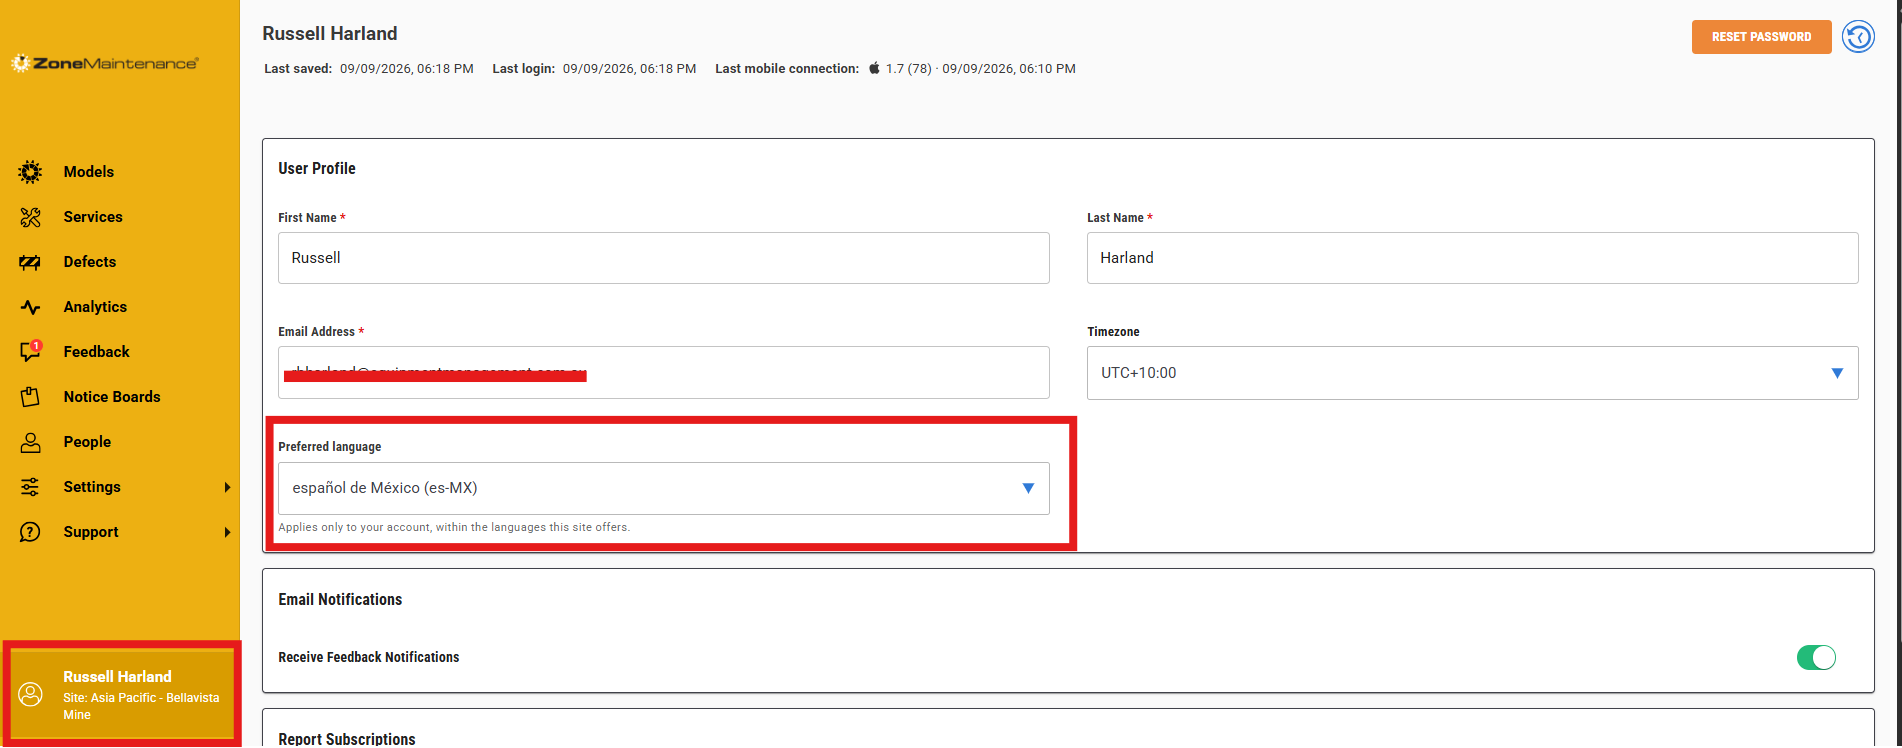
User profile setting to change default language to preferred language.
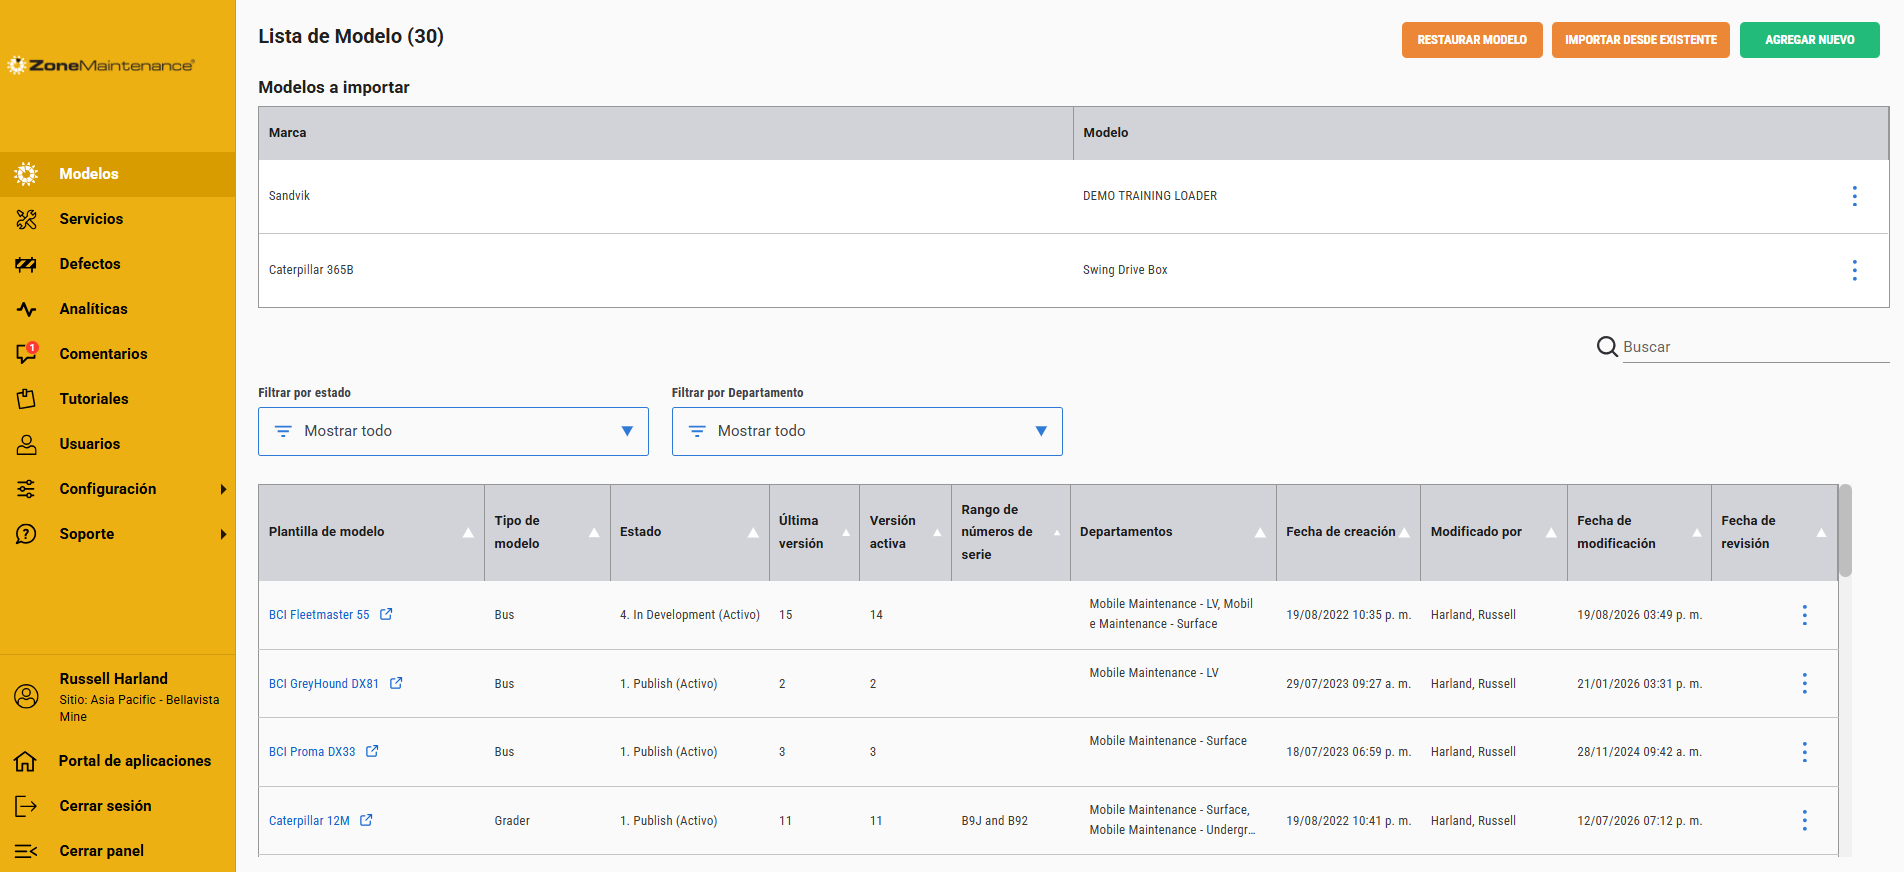
Site application translated by refreshing the screen.
Note: If you find some areas are not translated, please let us know.
Within Site Application Settings, we have changed the old term "Custom Caption" to Site Terminology
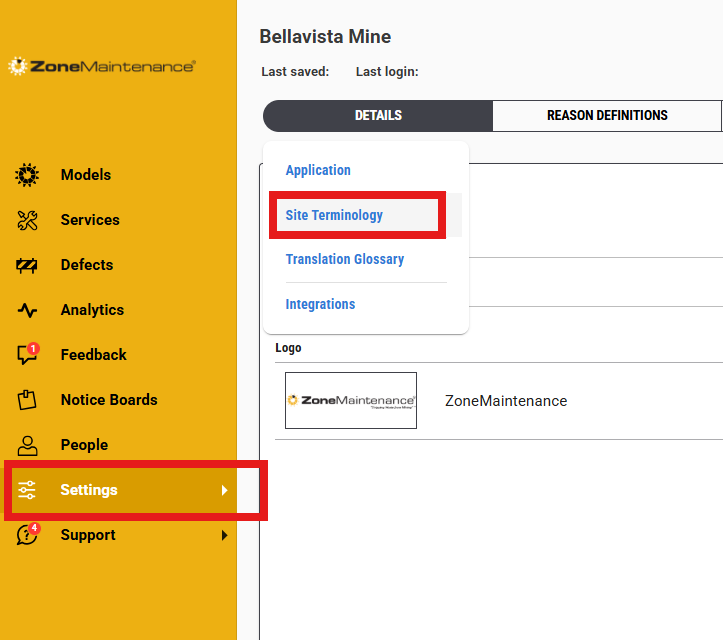
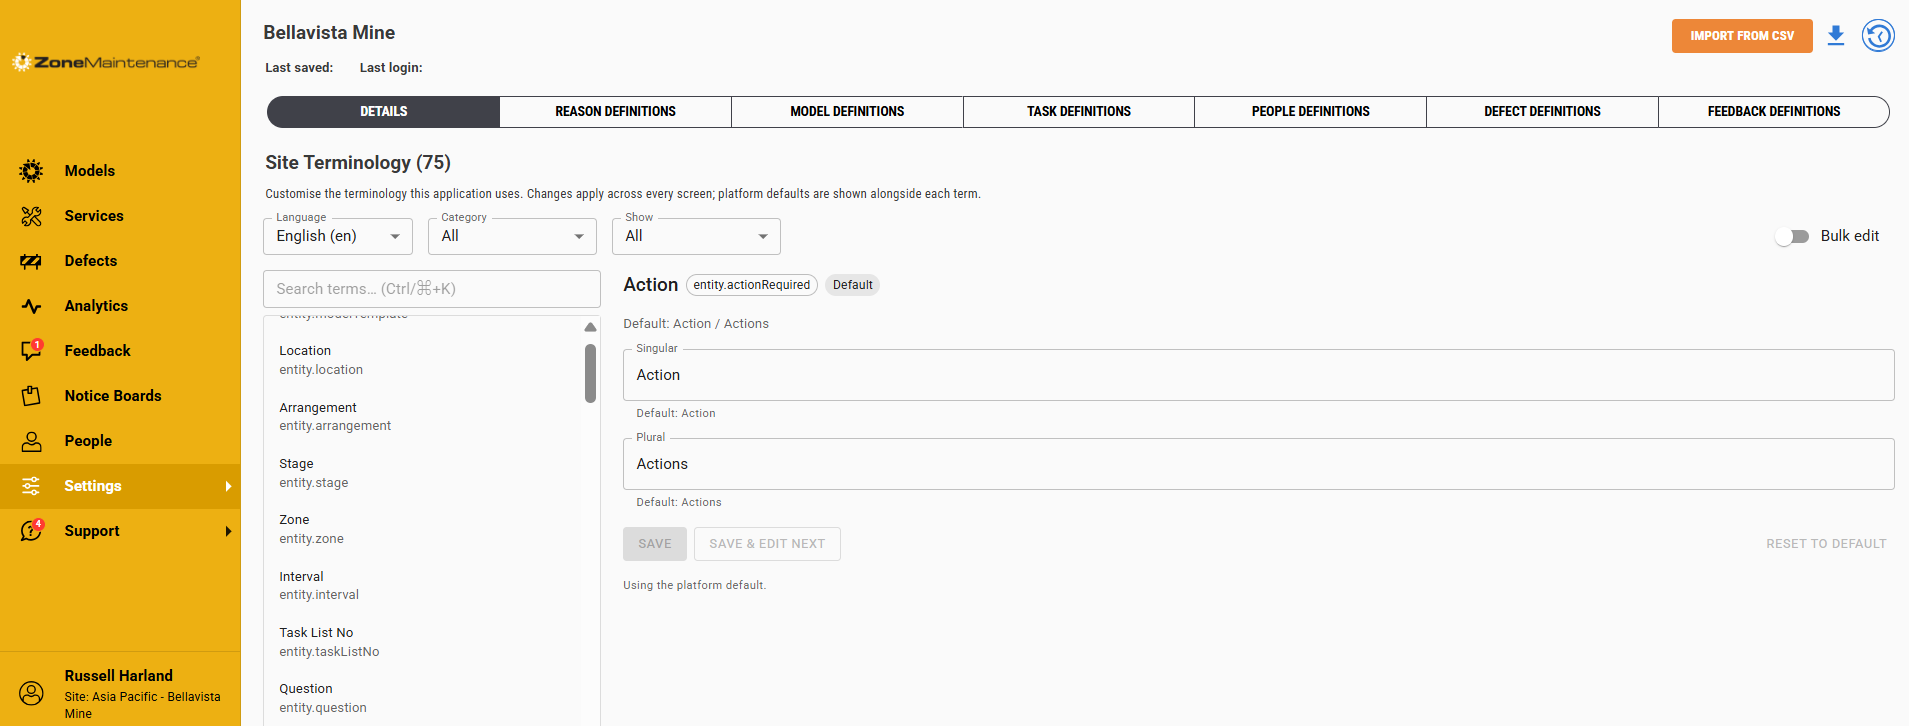
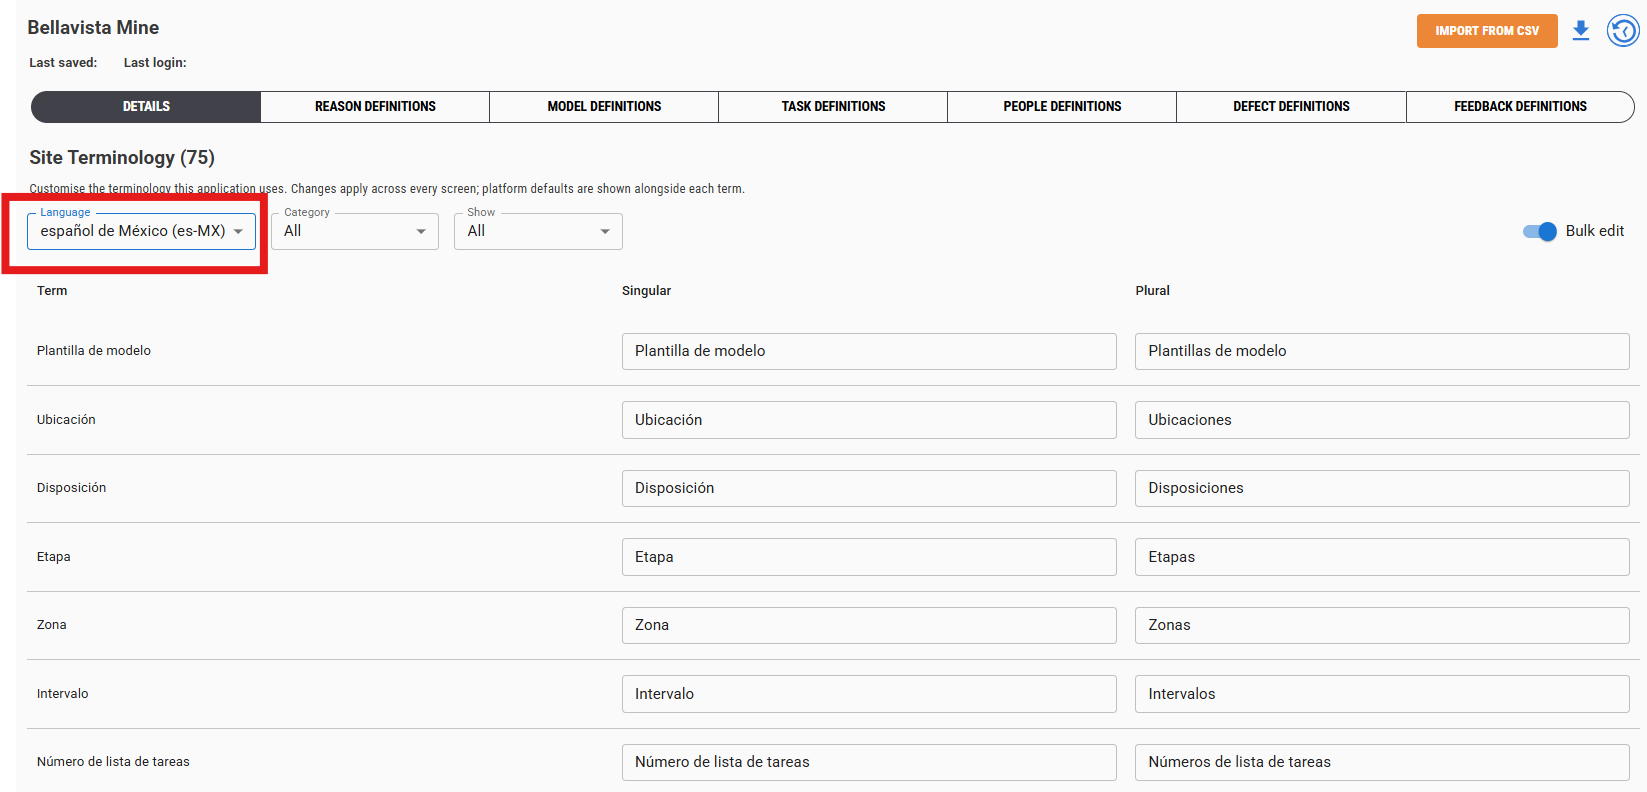
Site Terminology screen has improved. You can use the search to find your specific field to change or select the Bulk Edit toggle to open all fields.
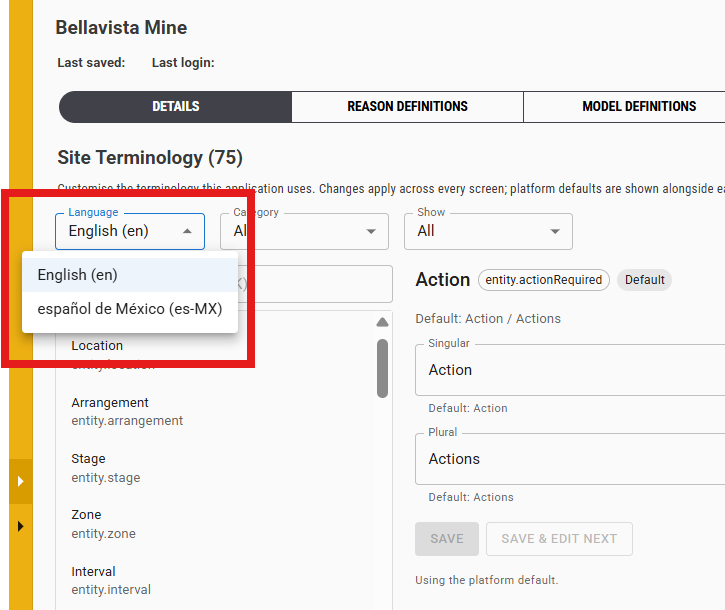
To edit fields in site available languages, use the dropdown to select. This will provide all of the fields in the selected language and can be changed to align with sites preference.
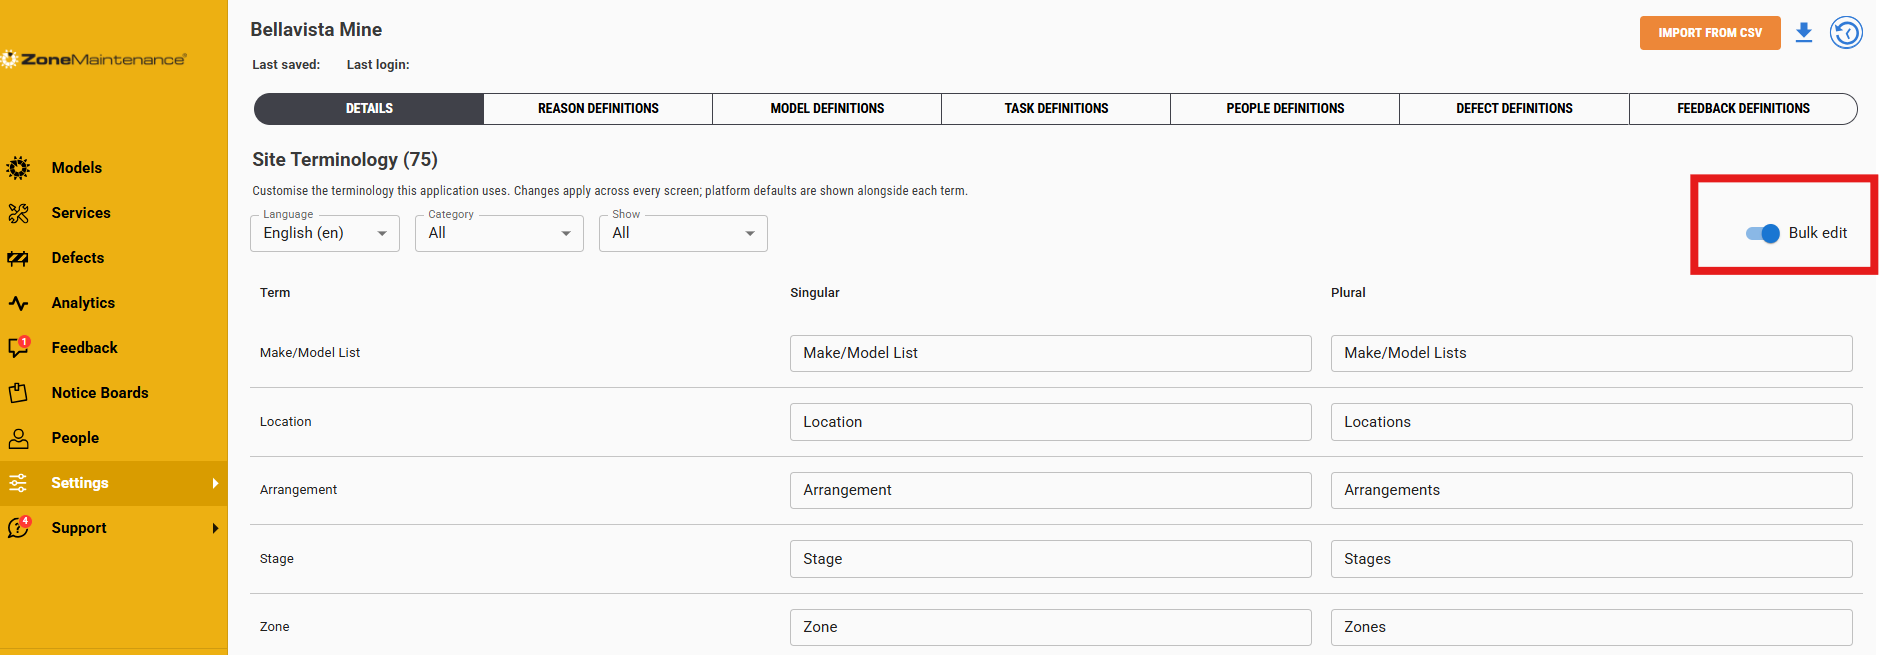
Bulk edit toggle. Additionally, in the top right of the screen you will see the option to download the site terminology as a csv file which can be used to upload to another site application.
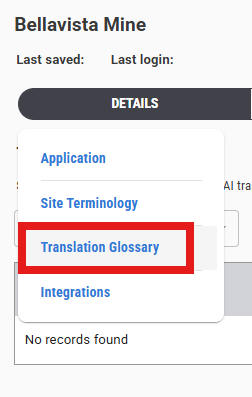
There is another level available to provide site based terminology via a glossary entry. When ever a new model is uploaded to site, tit will identify if there is a term in the glossary that needs to be changed and will automatically make the change.
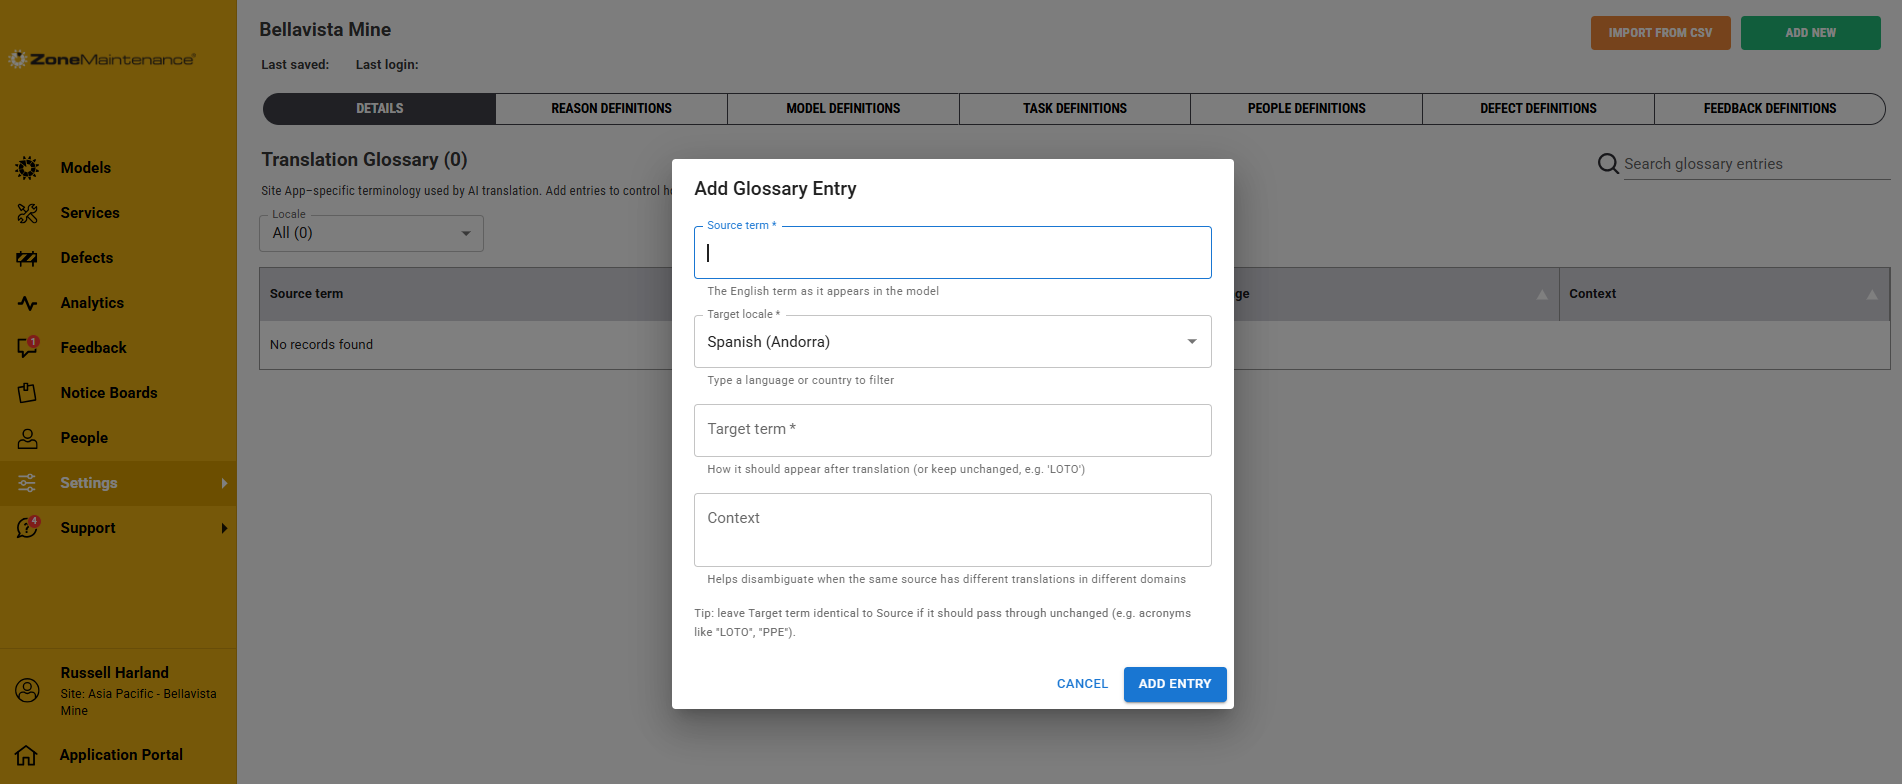
Add a new term using the add button top right of the screen. Fill in the details and add by selecting the Add Entry button on the bottom right of the screen.
Was this article helpful?
That’s Great!
Thank you for your feedback
Sorry! We couldn't be helpful
Thank you for your feedback
Feedback sent
We appreciate your effort and will try to fix the article