Mobile Application
Purpose:
To enable the execution of the Job process and content in a digital format.
Click on walk-through link for Preview Job: https://app.storylane.io/share/hnxm8us5n2kh
Click on walk-through link for Start Jobs: https://app.storylane.io/share/ptc8g3ra6850
Click on walk-through link for Checked Out Jobs: https://app.storylane.io/share/oxkg6egms82k
Click on walk-through link for Adding and Editing Images in Defects https://app.storylane.io/share/1btmr0uqbine
Note: the walk throughs are from ZoneMaintenance. The features and functionality is the same just a change of terms.
Process:
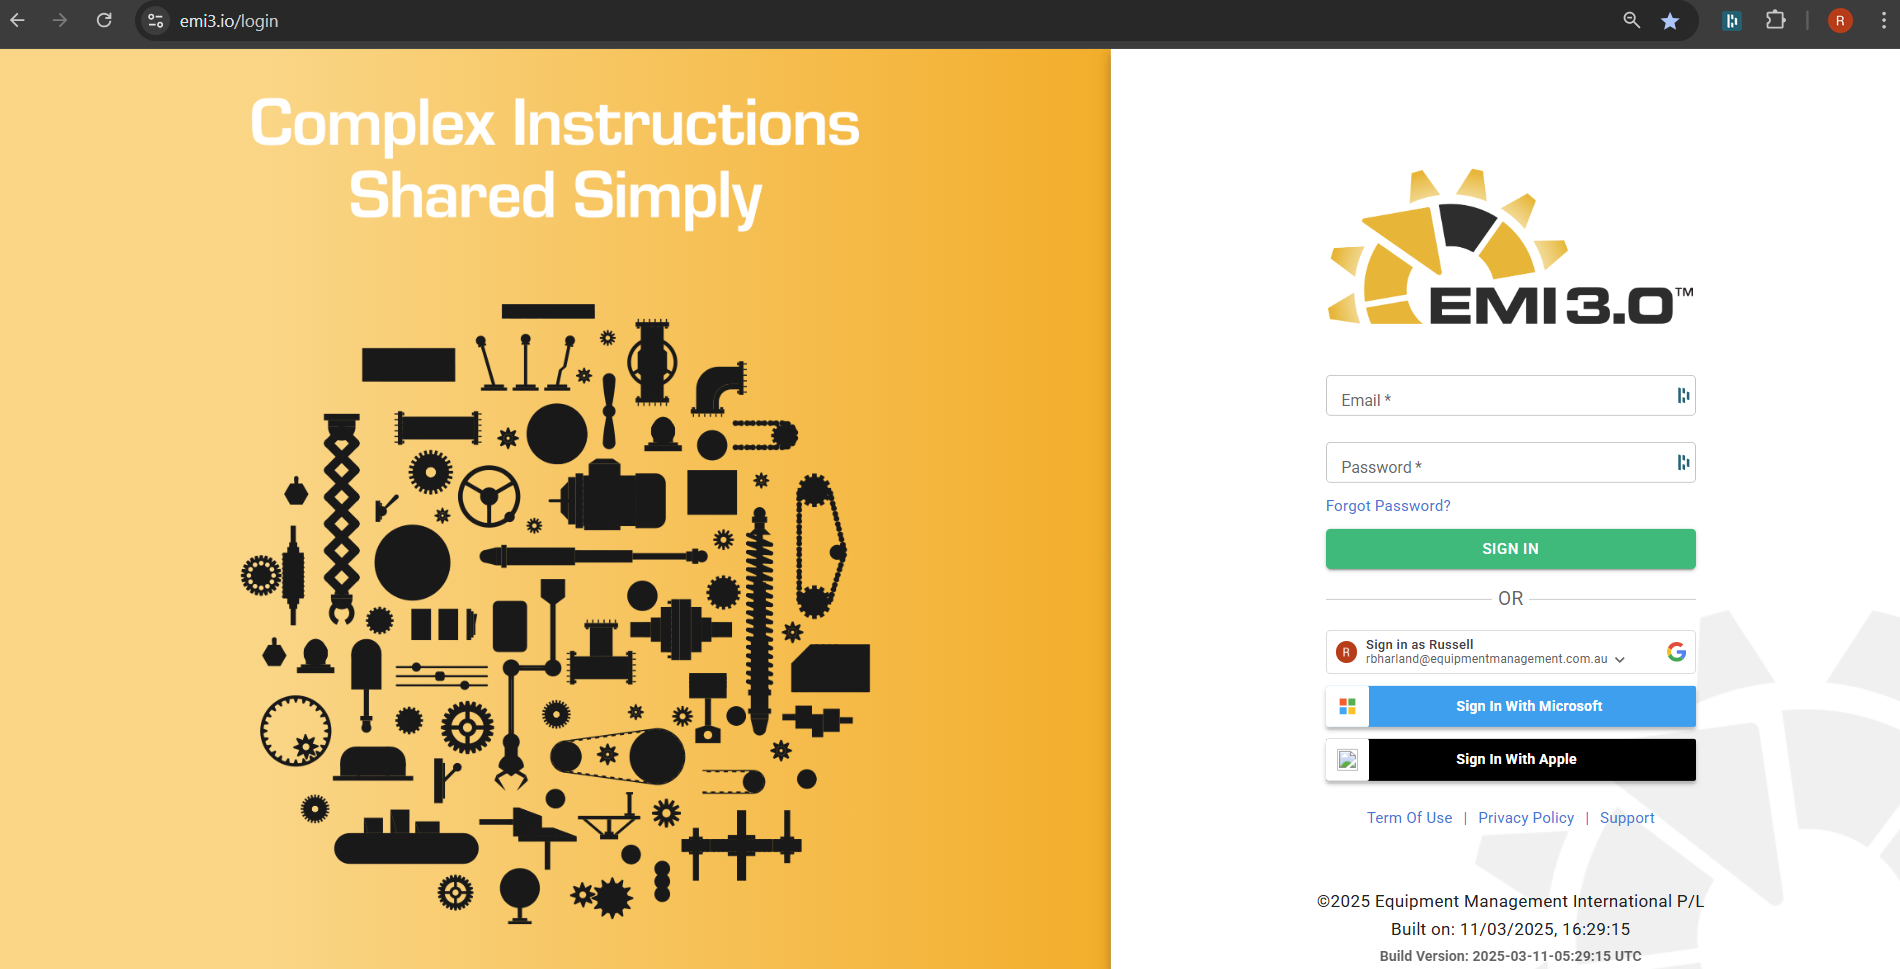
1. Log In
Log in using your provided username and password or the Secure Single Sign On option via the Google, Microsoft or Apple buttons
2. Job List
Job list provides all the Jobs that have not been completed for the models and roles that the person has log in can perform
Scheduled
- Jobs not yet started
Stopped
- Jobs stopped for whatever reason
In Progress
- Jobs is in progress by someone else
Checked Out
- Jobs has been checked out by someone else

3. Preview Job
Enables the user to investigate the Job without having to start the timer or save any details.

4. Begin Job
Begin the Job to start.
Complete the following screens to get to the tasks.
Check off parts and tools required.
Check off any permits that maybe required within the Job.
Complete the start questions every time the Job is started.

5. Preparation
Check them off to ensure that they are on the job before you start.
This is designed to be prepared and not having to leave the service for either of these items.
If there is an issue with these items, provide a reason why in the dropdown list when the missing box is ticked.
Or tick all to progress to the next screen.

6. Start Questions
To be filled in at each start of the job. Regardless, if it have been stopped, the new person on the job needs to answer these start questions again.

The Process
The process can be shared with the field personnel to help them understand what they are doing and where they are going.

7. Tasks
Tasks are set in an order to promote an efficient flow within the stage or area.
Content is presented in the right panel to define what is expected with the task and specific information is provided to benefit the inspector assigned to complete.
Click on the image to open larger and flick to the right to see more if available.
Complete the task using the green button top right of the panel.
The user can look at previous or next tasks with freedom.
You cannot complete other tasks unless the task with the blue dot is not completed first.
If you complete a task by mistake, just click on the "Task Completed" button to undo the change.

8. Skip Tasks
Skip the next task feature enables the user to progress through the service if a task cannot be completed.
The user can click on the skip this task button and give a reason why the task is to be skipped.

This will be recorded in ZoneMaintenance Analysis in the service impacts screen.

Access previous skipped tasks via the menu/skipped tasks link

Complete the task and back button to return to current task.

9. Documents and Questions
If the button is highlighted, then the user can view a document or answer a questions.
A question could be compulsory meaning that the user needs to answer it to complete the task.
Questions are designed to determine the condition of the component by giving it a value or selecting from a dropdown list or other question formats.


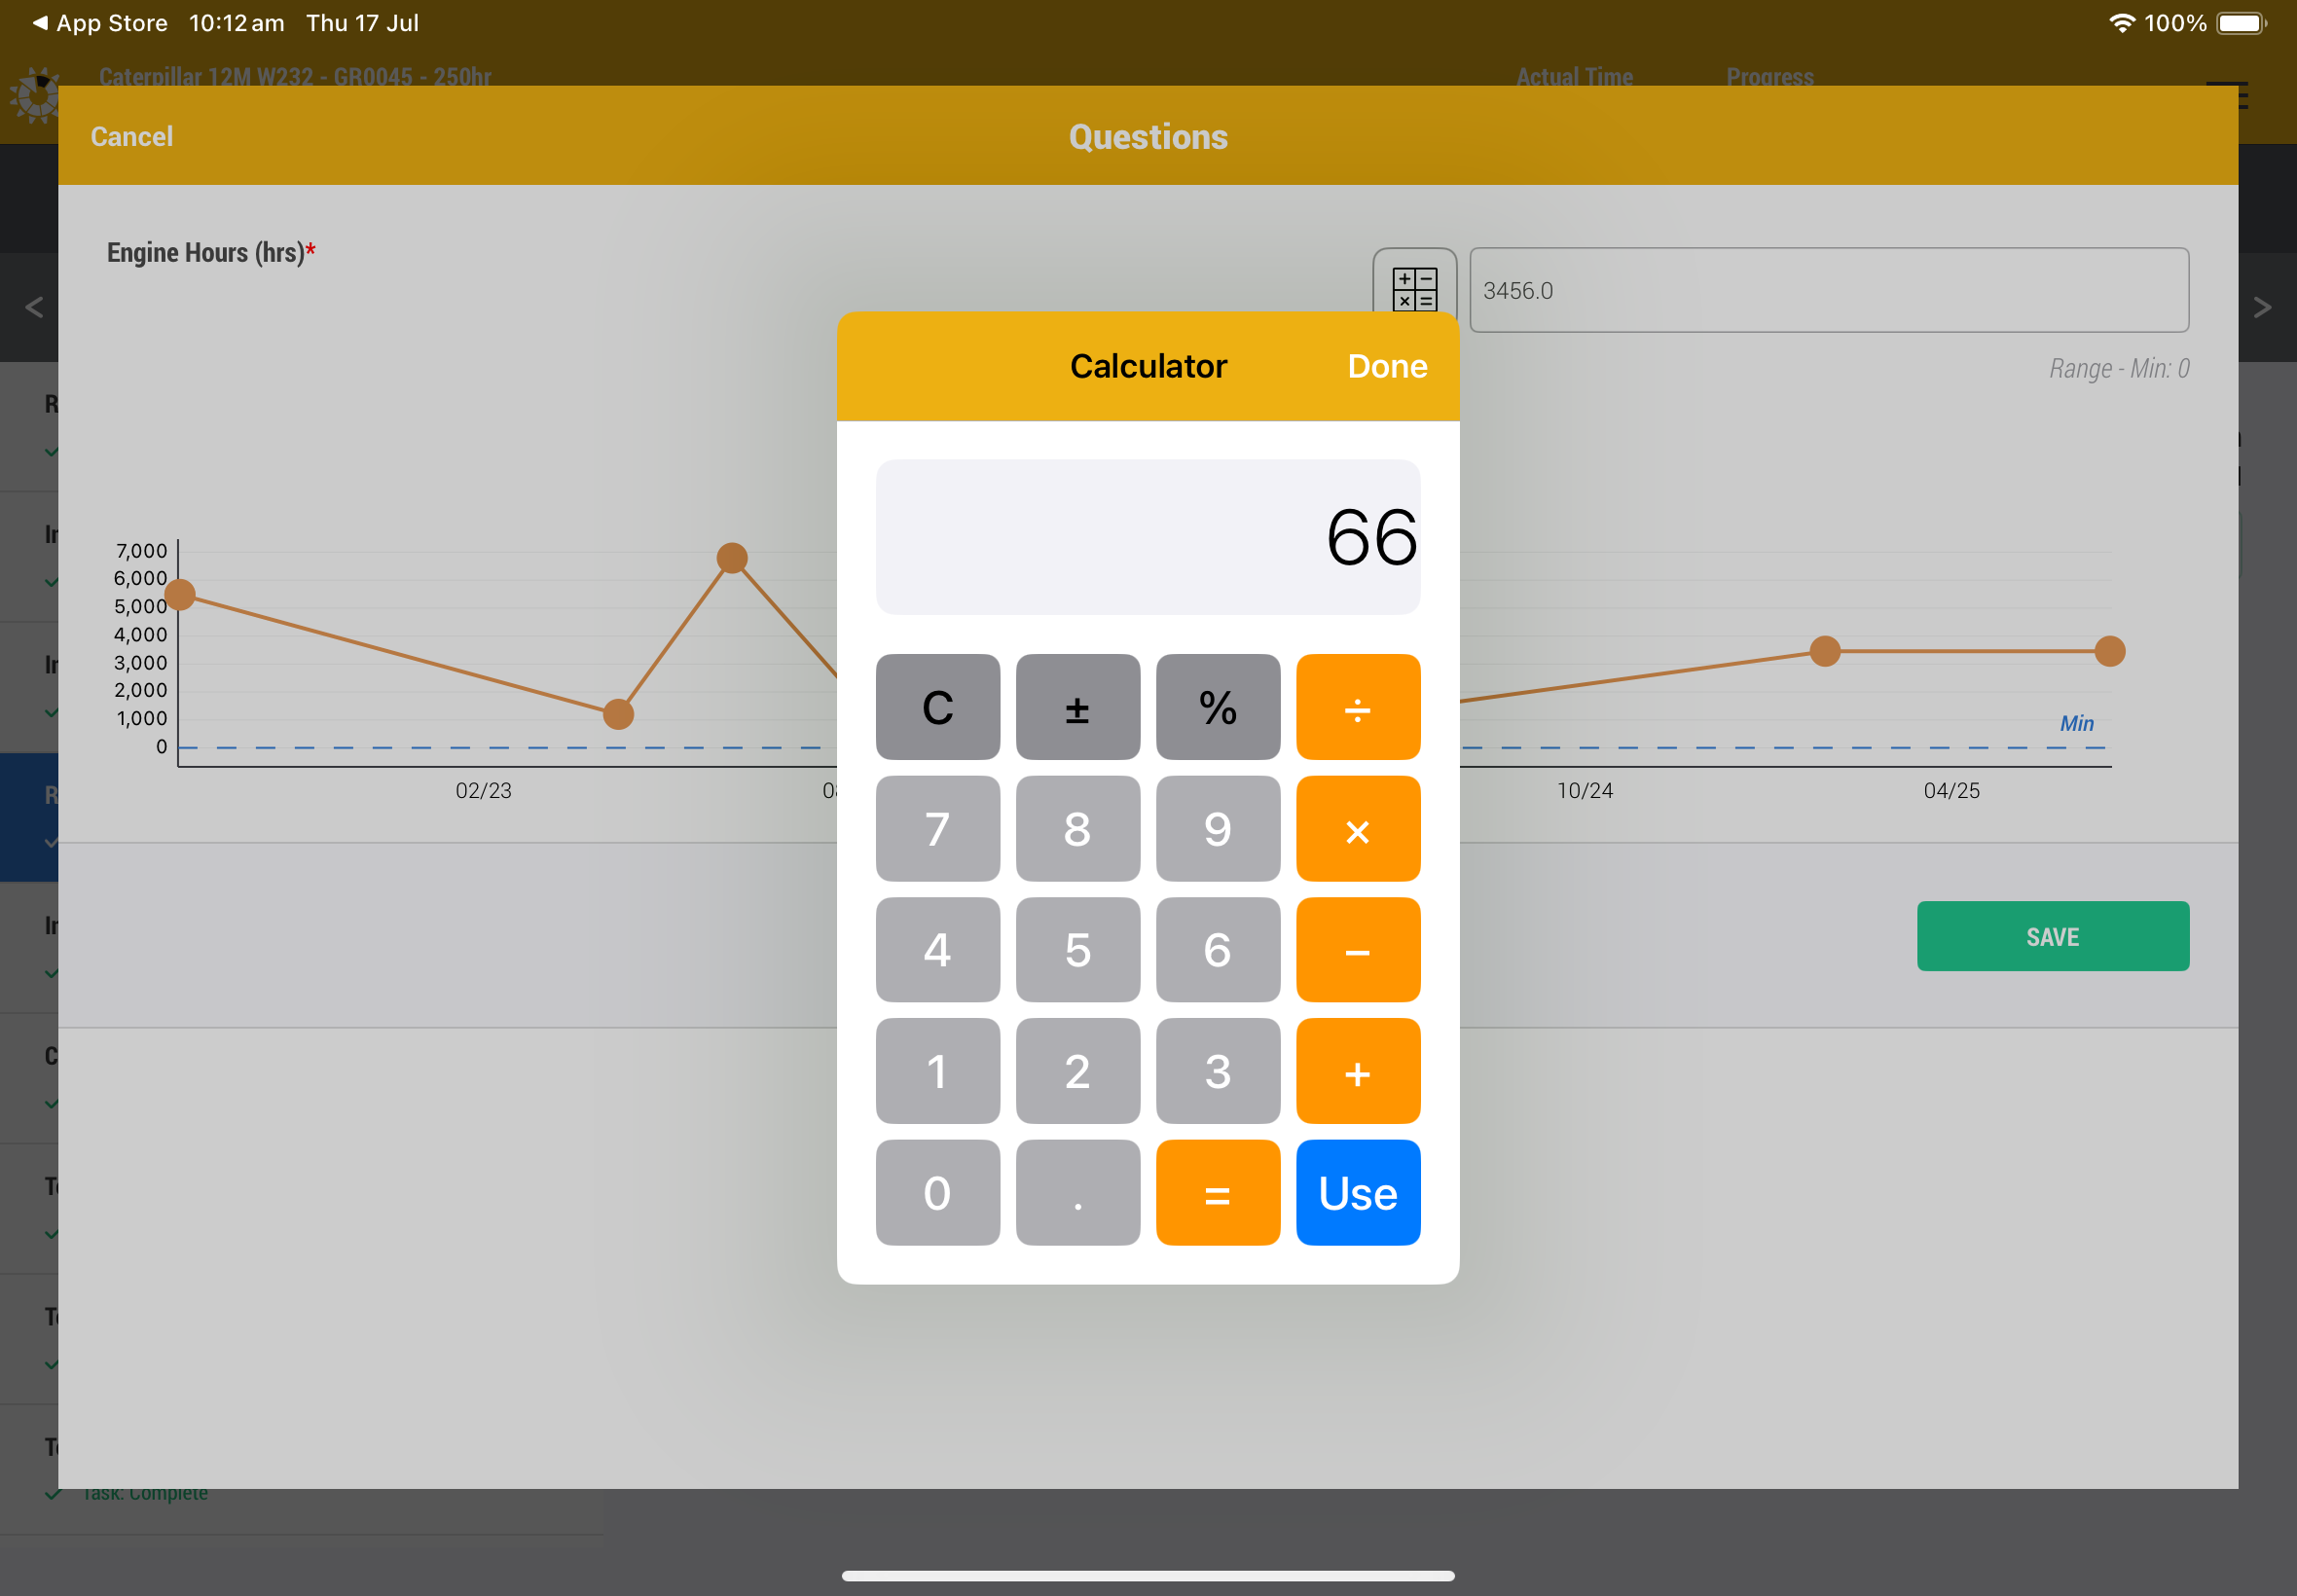
10. Condition Monitoring Questions
A question might be to provide a value that is being trended.
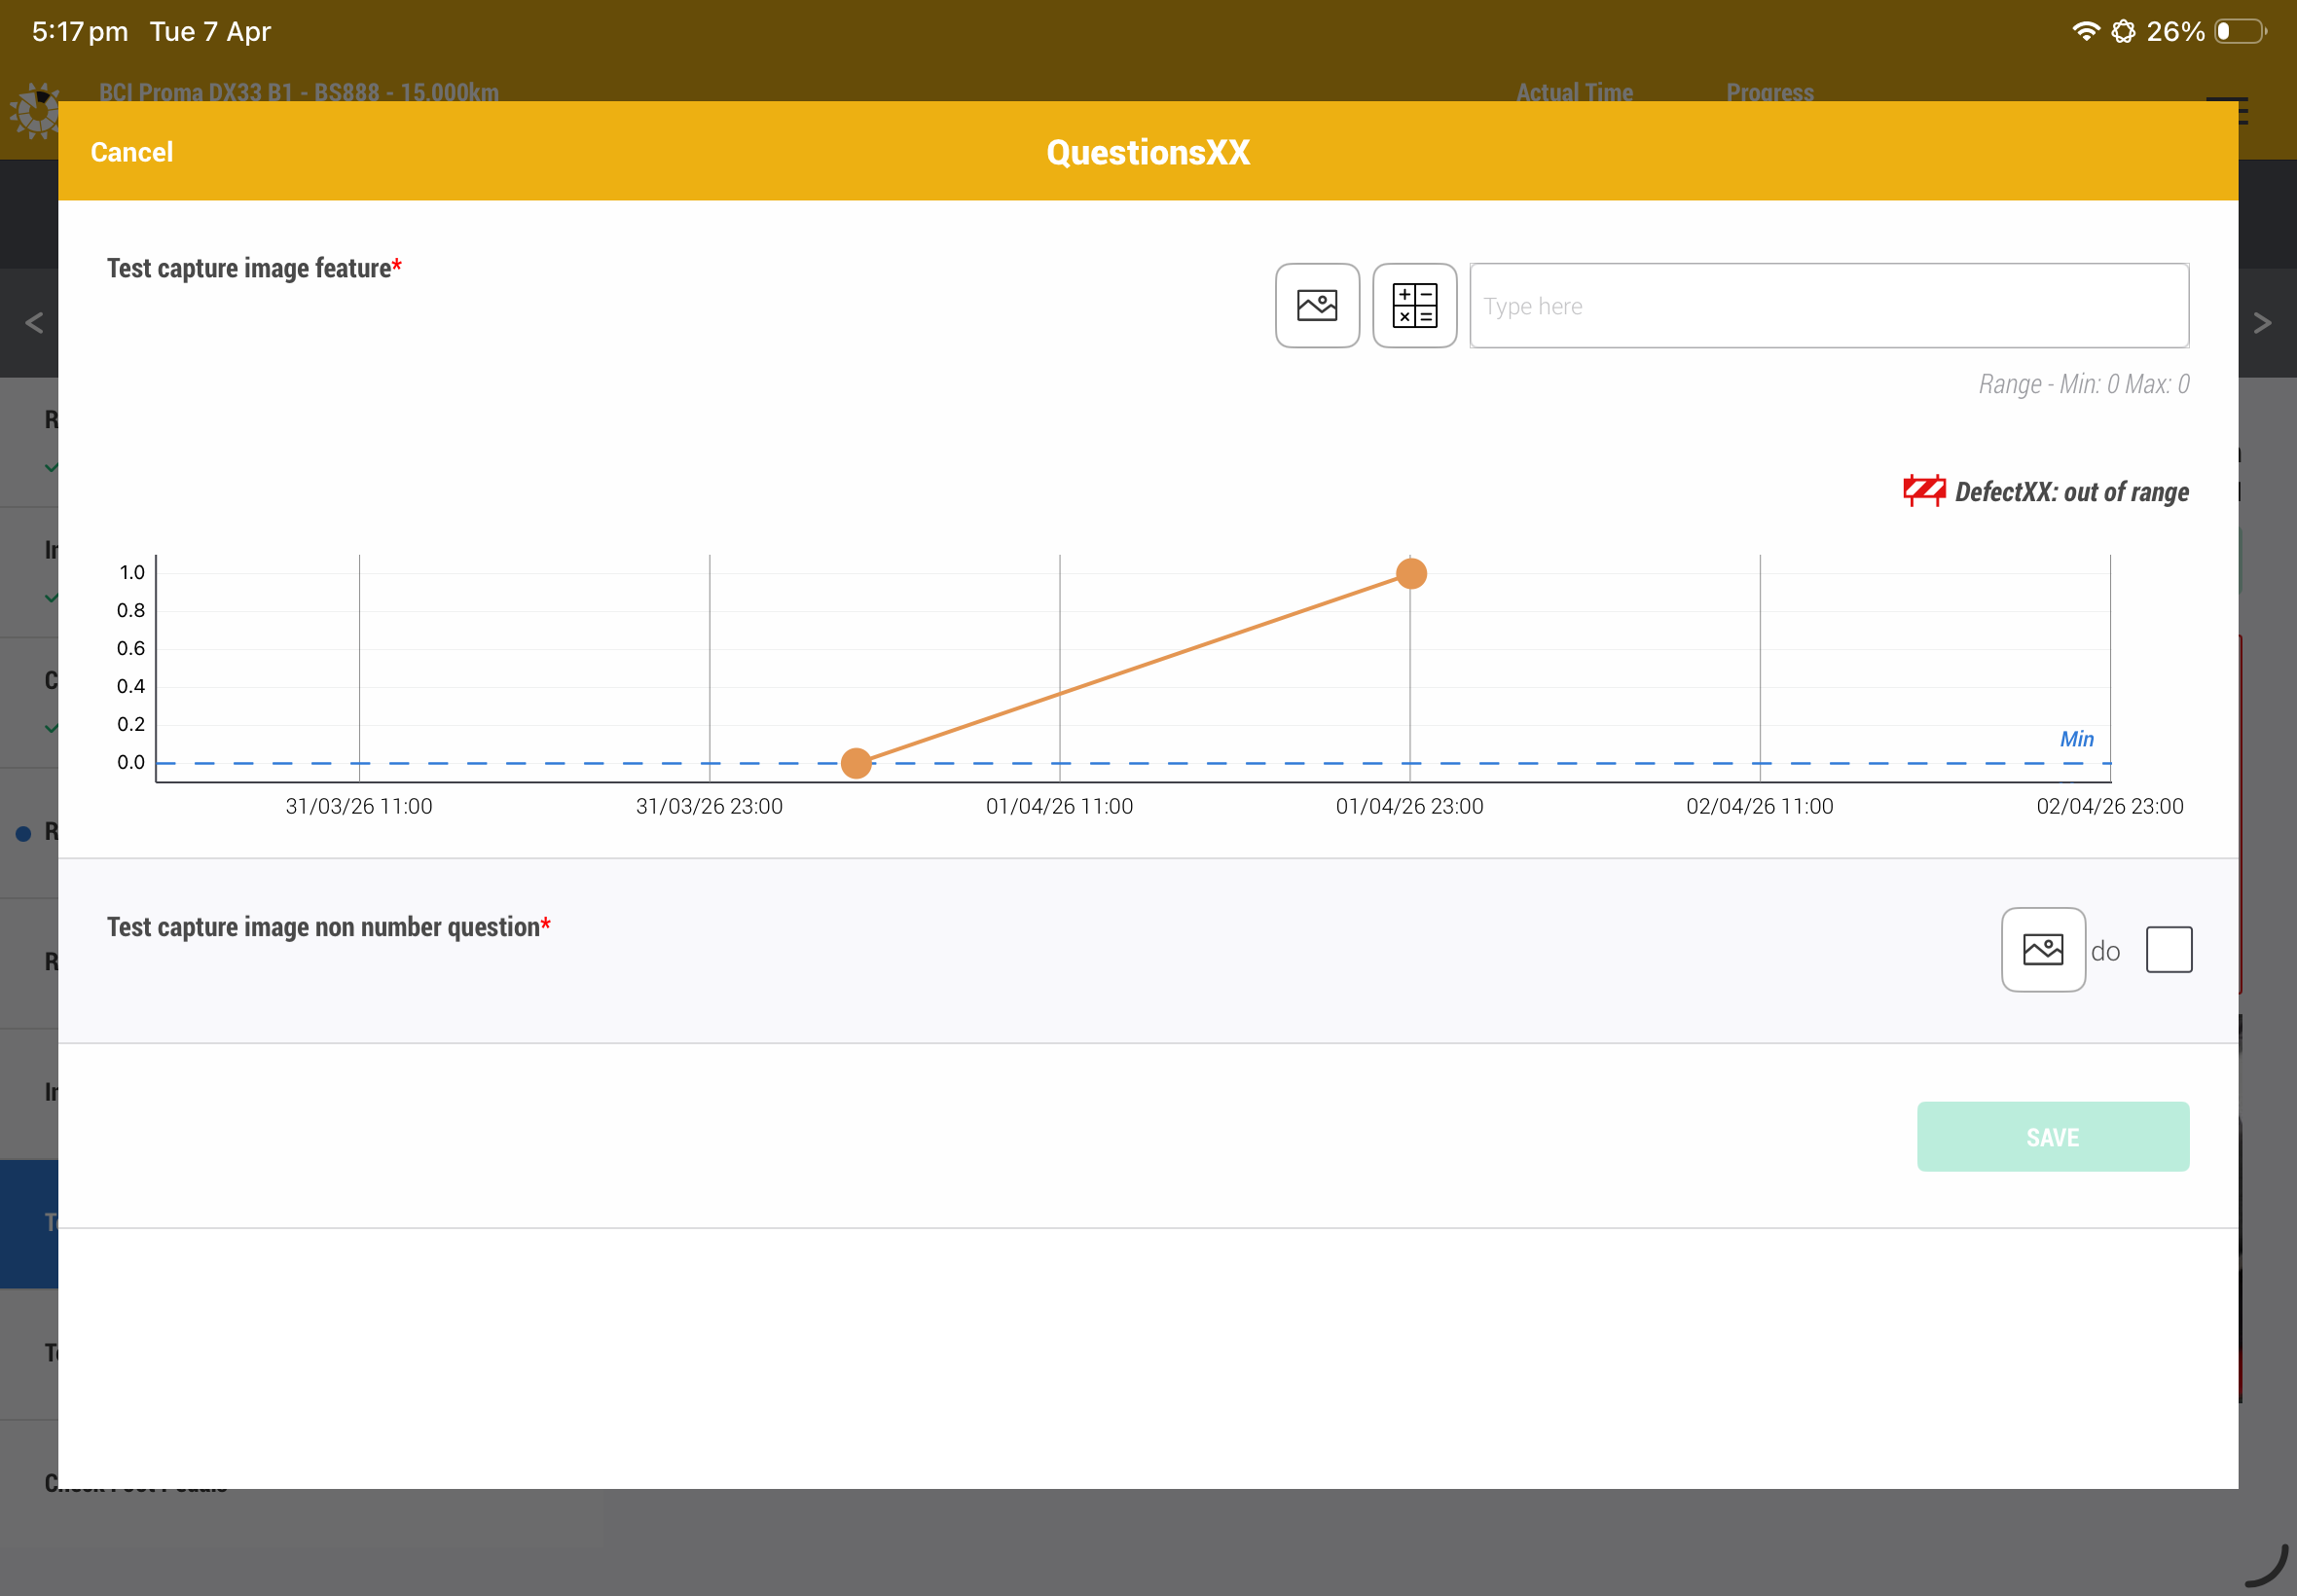
A minimum or maximum range is provided and a specification is listed.
A value outside of the min/max range will trigger a defect.
If there are more than one CM question and all are out of range, then a defect will be raised for each question.
Click on the calculator icon to bring the simple calculator to the front. The use button will populate the field for you.

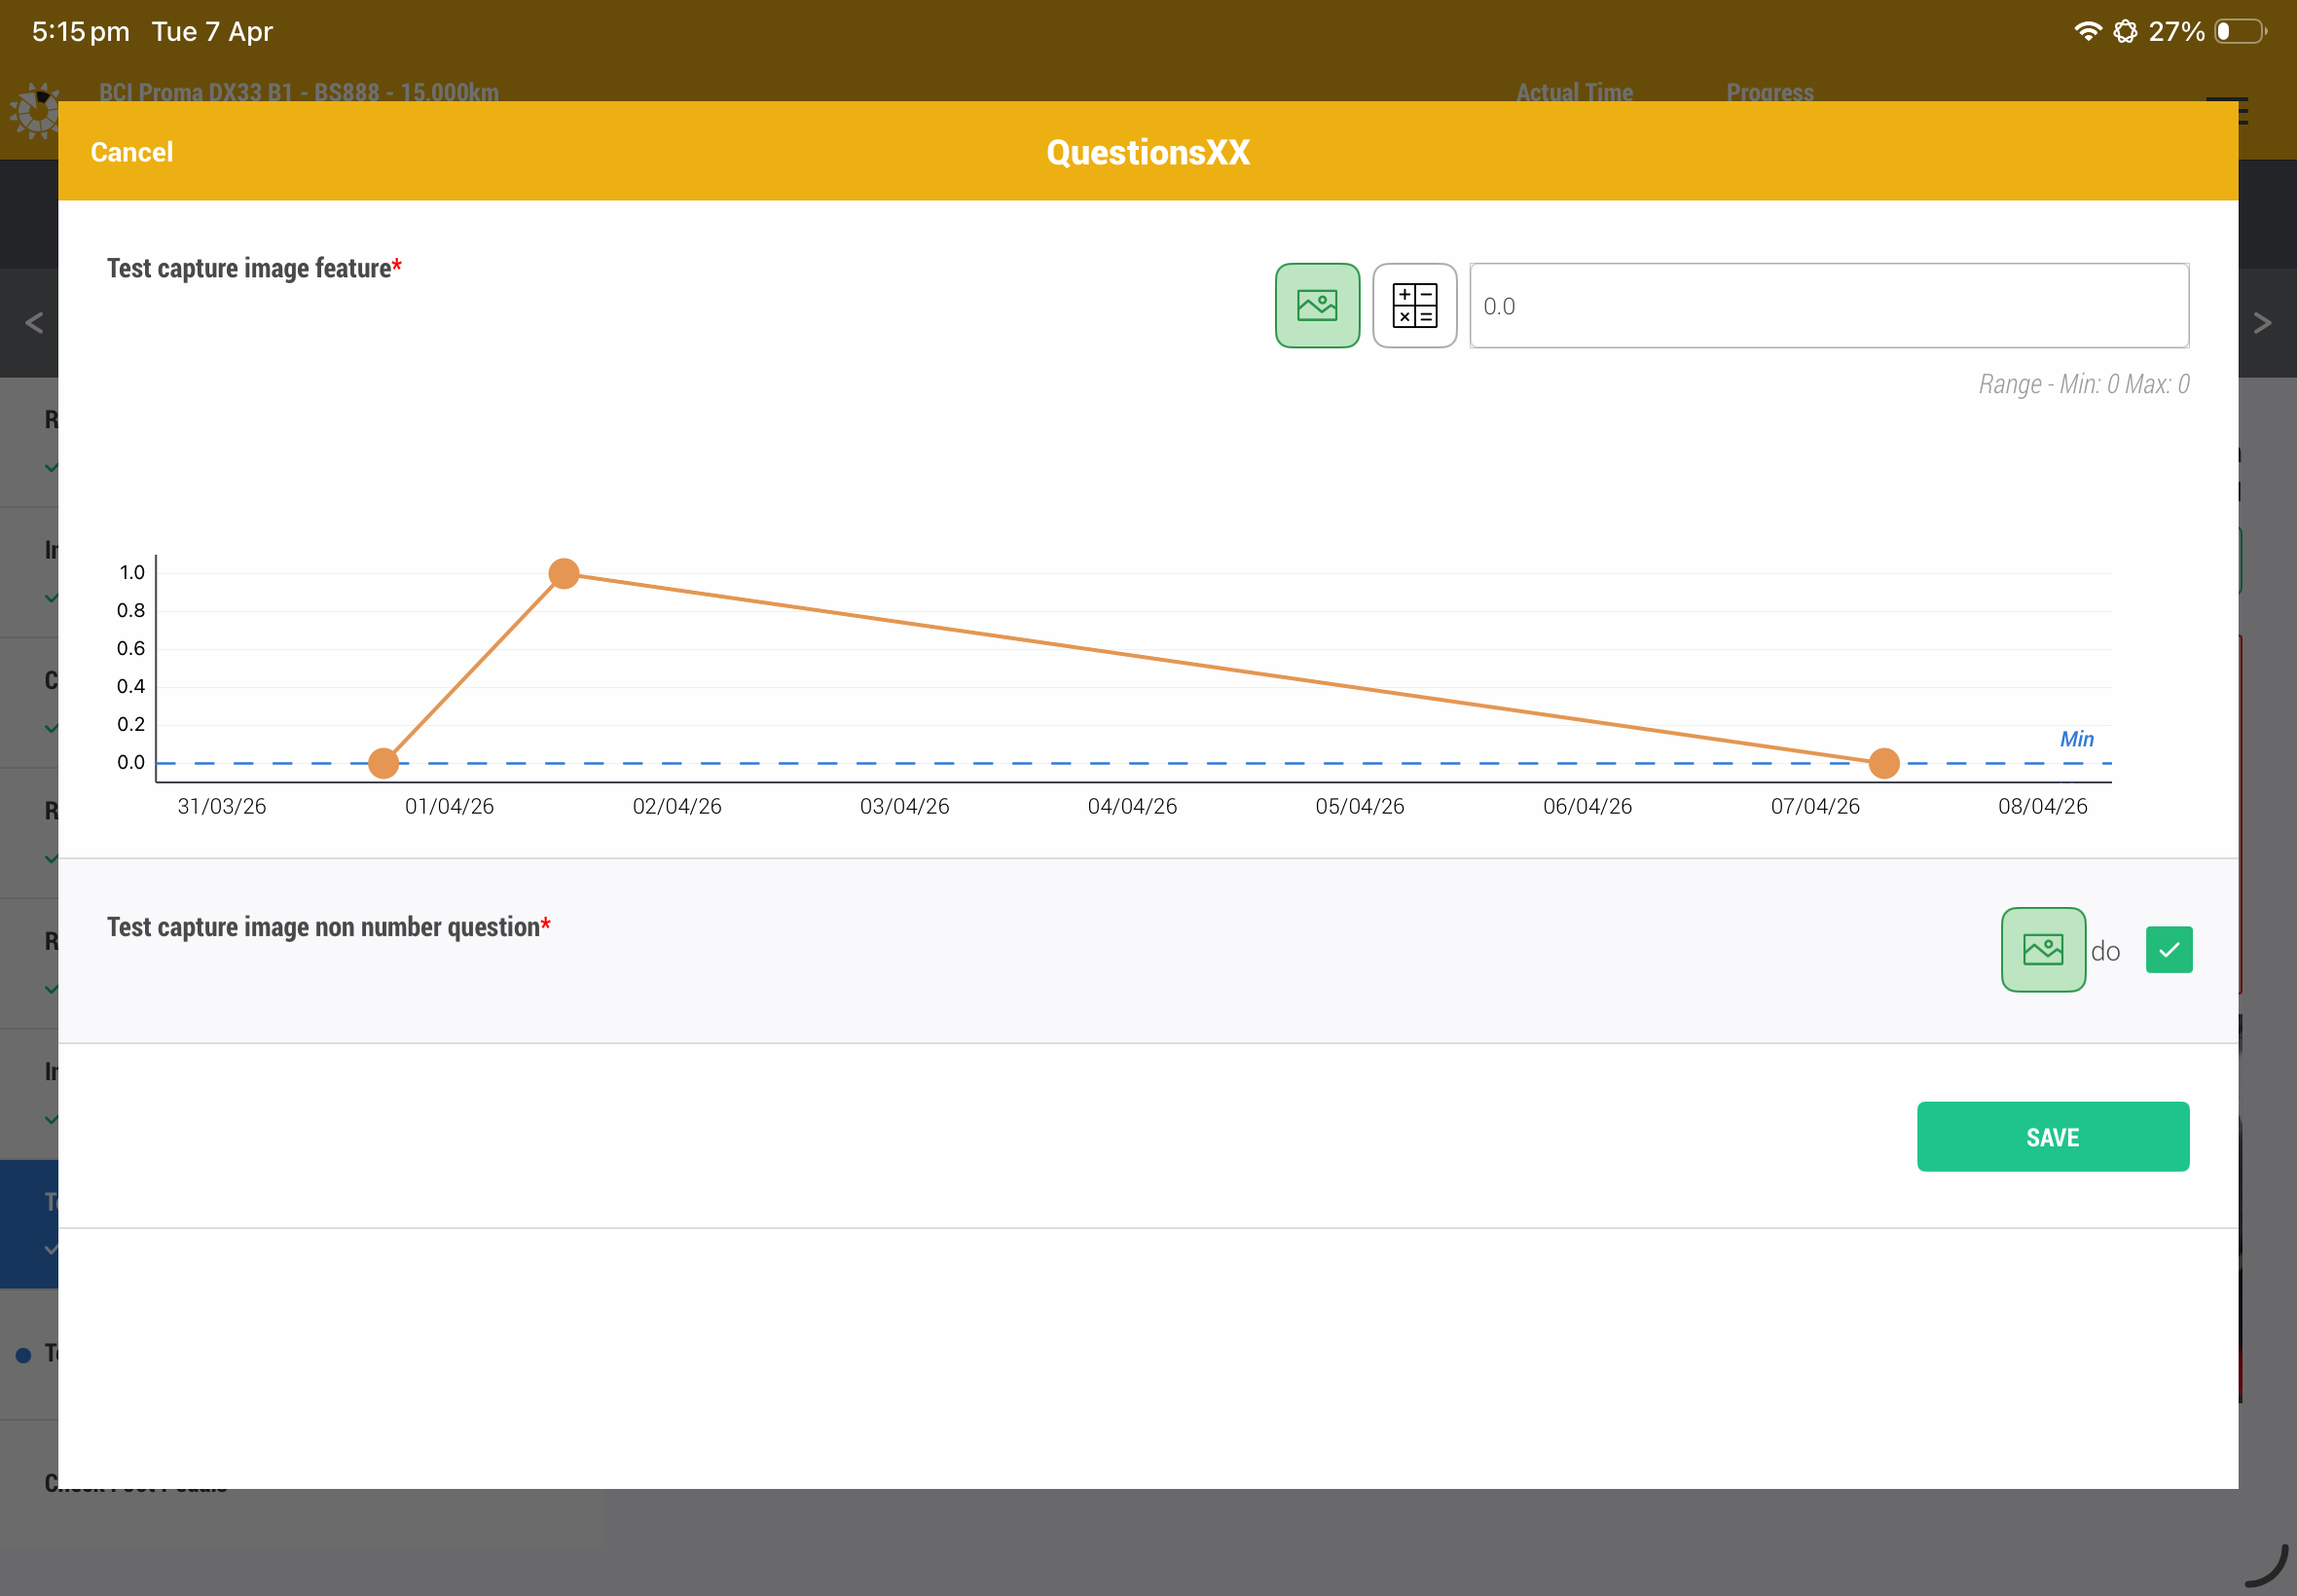
If the "Take an Image" feature has been triggered, you will see a small image icon next to the question response box.
You will need to click on this icon to open the device camera to take a single photo.
This is compulsory and will not allow you to save the questions until completed.
11. Findings
A finding can be raised either by
1. clicking on the Finding button on the main screen
2. answering a question that triggers the finding feature
If a finding is registered then the user must complete the fields, add further details about the finding and take images for future Job.
A finding is raised against a task, but a finding can be raised but not assigned to the task. Click on the x in the task box removes the task from the registered finding.
Click on the icon on the top left of the thumbnail to mark up the photo.

Fill in the fields with the dropdowns


Add images

Add audio recording

Add parts

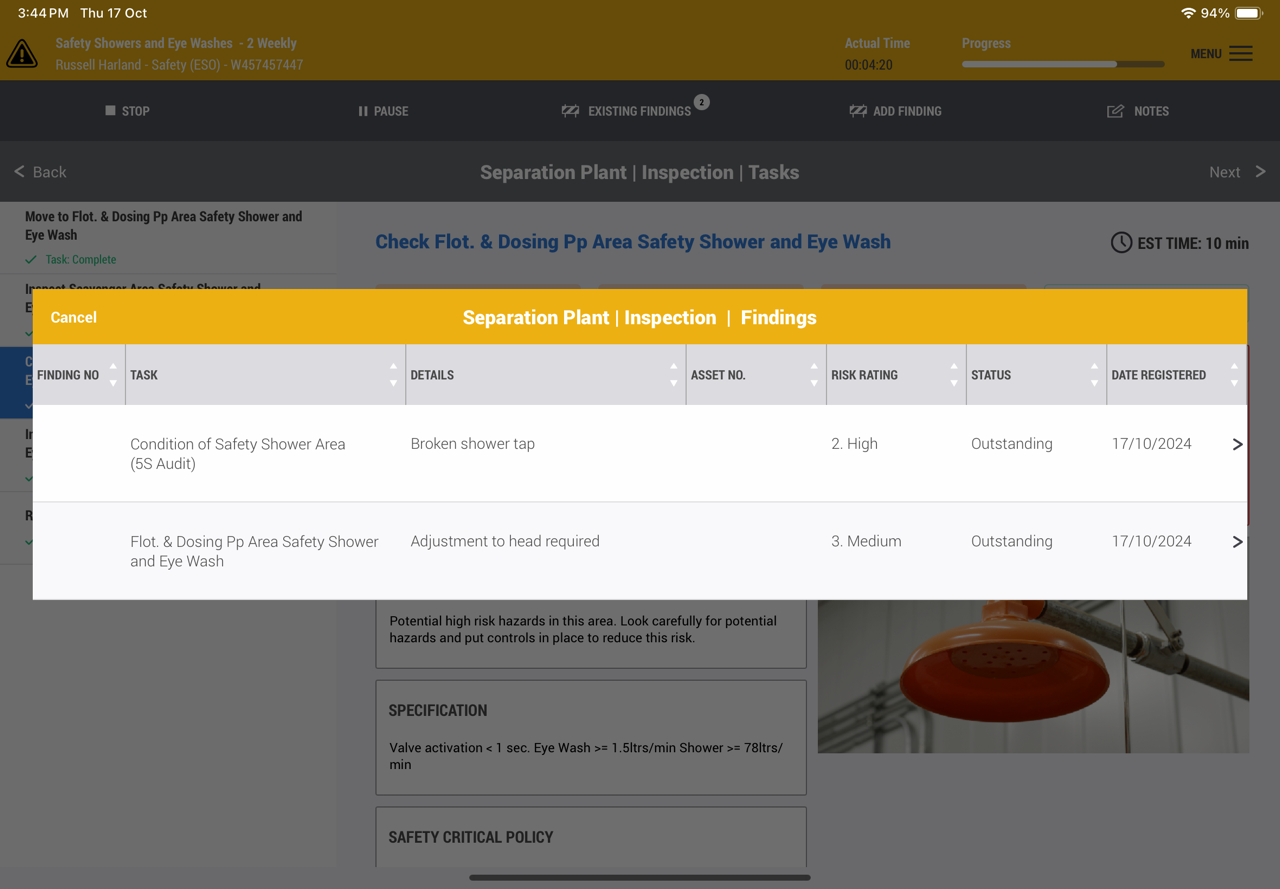
12. Existing Findings
Existing findings are findings that have been reported during the Job or that were reported during previous Jobs that are still outstanding.
This list is only for the stage or area the user is currently in.
The user can click on these findings and change the status or risk rating. Take more images to outline the changes that has occurred.
It is important for users to change findings to completed if the finding looks to have been rectified.
13. Notes
User can leave a note to provide some information relevant to the service which is not.
- A finding
- A feedback
Example might be another person has been added to help the user with the Job. The new person is not assigned any task but the signed-on user is accountable to indicate if they have been completed. The user might like to add which tasks the new person completed for future reference.

14. Pause
User can pause the Job and provide a reason.
As the Job is being timed any impact that causes the user from performing his or her duties should be captured by pausing the Job.
If the person is taken off the Job, then the job must be stopped.


15. Stop or Completed Job
Stopping a Job is designed to enable the user to log off to be handed over to someone else to complete.
User is to give a reason and sign.
Prior to stopping the Job the user can view recorded findings to show the supervisor or make changes prior to the sync.
Additionally, the user can stop and log out with one button. This will sync the data and log the user off with the one click.


16. Menu
Current Task - task the user to the last task completed.
Skipped Tasks - gives the user a list of the skipped tasks to be completed.
They can be completed in any order
Notice boards - information that might be useful to share with all users.
Feedback - provides the user the option to offer ideas or suggested changes to content, flow or issues.

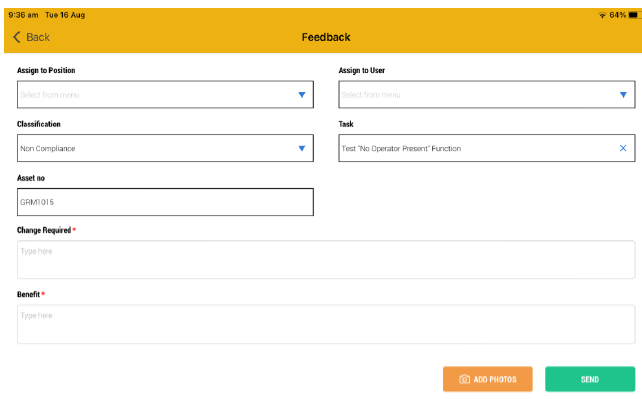
17. Feedback
Adding feedback will help you to share your ideas on how to improve the content and process.
Assign the feedback to your supervisor so it can be actioned by the right person to make the change.
Add images as well can be very helpful.
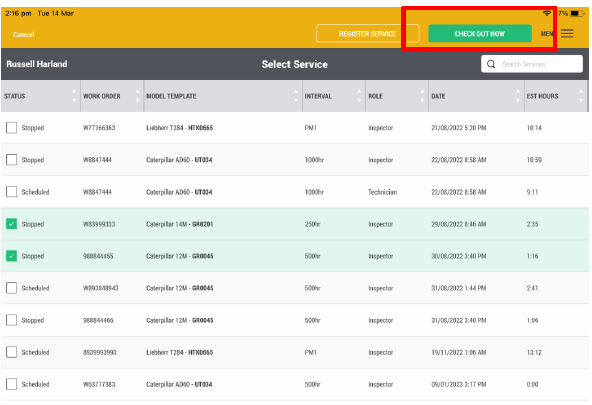
18. Check Out/Check In Process
If a service is being performed in an area without wifi, it is important to check out the Jobs being performed.
One or more can be checked out by the user. But this means no one else can access these Jobs.
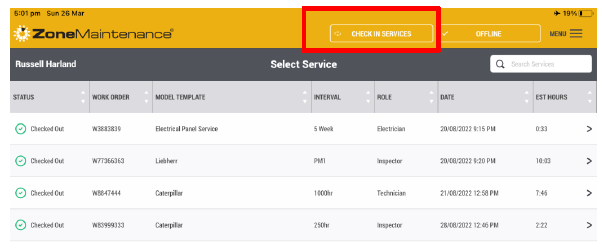
19. Check In
A user that has checked out a Job must check the Job back in when they get to Wi-Fi range.
Click on the button to check the Job back in.
This gives others access to the Job information or can start a stopped Job.
If this is not followed, then the user that has checked out the Job will lock the Job from anyone else.
This is like taking the paper-based Job sheet home with you.
20. In Progress
If a user does not stop a Job, signs off and sync’s the Job when in Wi-Fi range, the Job remains in progress.
This stops anyone else from starting the Job as it has been assigned to that person that has started the Job.
If the person leaves site, it is like taking the Job sheet with them.
The supervisor can reset the Job via the web application Jobs screen but the risk is that data could be lost and the Job would need to be performed again.
21. Register Service
A Job can be registered from the iPad if necessary.
The user needs the information to complete the compulsory fields to register a Job.
They also need to be within Wi-Fi range to complete this process.


Start the job to begin

Enjoy
Was this article helpful?
That’s Great!
Thank you for your feedback
Sorry! We couldn't be helpful
Thank you for your feedback
Feedback sent
We appreciate your effort and will try to fix the article